Multi-zone refrigerant line routing: decisions you can't undo after walls close
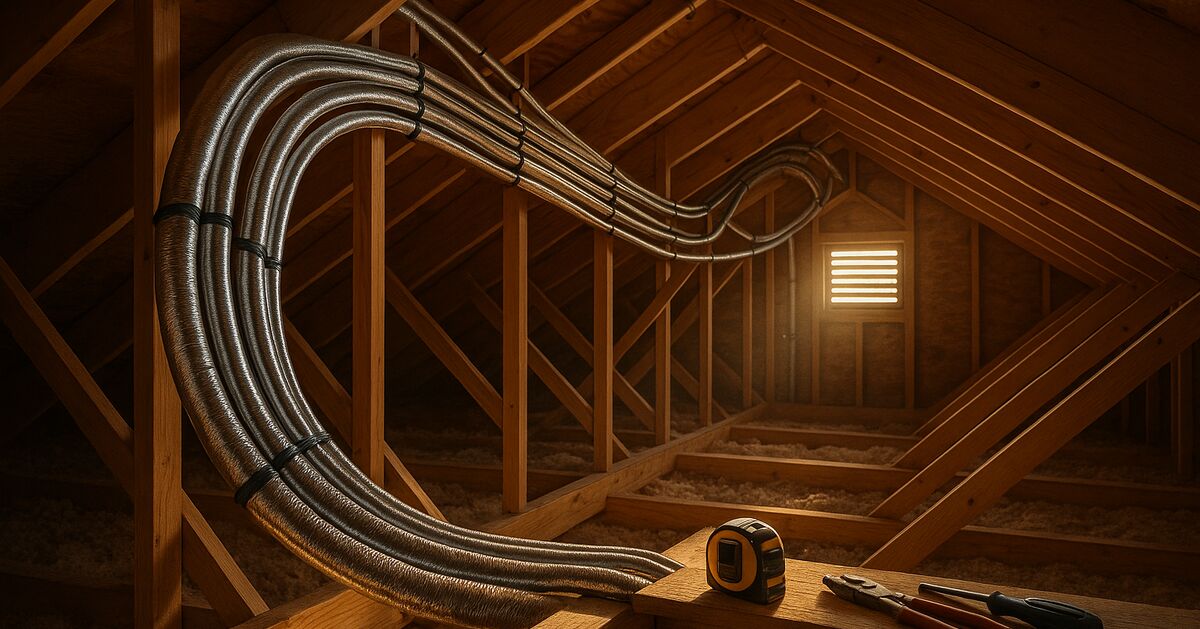
Refrigerant lines buried inside your walls are the one part of a multi-zone mini-split system you will never see again. Every other decision, the thermostat setting, the fan speed, even the indoor unit itself, can be revisited later. The lineset routing cannot. Get it wrong and you are looking at opened drywall, replastered ceilings, and a repair bill that dwarfs the cost of planning it correctly from the start.
This guide is specifically for homeowners in Sarasota, Bradenton, Lakewood Ranch, Venice, and the surrounding area who are planning a multi-zone ductless system and want to understand what needs to be decided before a single hole is drilled. The decisions are not complicated, but they are permanent, and most people only learn about them after the fact.
Why multi-zone routing is so much more involved than a single-zone install
A single-zone mini-split is relatively forgiving. One outdoor unit, one indoor head, one lineset running between them. If the route is slightly inefficient, the performance impact is manageable.
A multi-zone system is a different animal. One outdoor condenser connects to anywhere from two to eight indoor heads, each requiring its own refrigerant lineset. Those linesets often need to travel through interior walls, above ceilings, through attic spaces, or beneath raised floors before reaching each room. In a typical Sarasota or Lakewood Ranch home, that can mean four separate linesets fanning out in four different directions from a single outdoor unit.
Every junction, every bend, every foot of run affects refrigerant pressure and system efficiency. More importantly, every path those lines take must be chosen before the walls close. There is no "we'll figure it out later" on this part of the job.
Our ductless mini-split installation and service page walks through the full scope of what a professional installation involves, but the planning phase for multi-zone line routing deserves its own conversation.
Decision 1: Where the outdoor unit lives relative to the indoor heads
The outdoor condenser placement drives almost everything else. In a multi-zone system, refrigerant lines radiate outward from the condenser. The farther each indoor head sits from the outdoor unit, the longer its lineset must be and the more carefully the routing must be planned to stay within manufacturer specifications.
Most multi-zone condensers allow a maximum lineset length of somewhere between 50 and 100 feet per zone, depending on the brand and system capacity. Exceed that and refrigerant distribution becomes uneven, some zones run harder than others, and the compressor wears prematurely.
In coastal homes on Casey Key or Anna Maria Island, the outdoor unit also needs to be positioned away from direct salt spray while still being accessible for the linesets to reach their targets without absurd routing gymnastics. That often means the north or east side of the structure, on a raised pad or wall bracket, screened by landscaping but not crowded by it.
Before installation day, walk the exterior with your installer and confirm that the proposed condenser location allows linesets to reach every planned indoor head within spec, while also accounting for future access, hurricane straps if required, and local setback rules. In Sarasota County, permit requirements govern some of these details, and what you need to know about permits before installation day is worth reading before you finalize placement.
Decision 2: Concealed versus surface-mounted linesets
This is the choice most homeowners do not fully understand until they see the finished job and feel one way or the other about it.
Surface-mounted linesets run along the exterior or interior walls inside a protective PVC line hide (sometimes called a raceway or lineset cover). They are faster to install, cheaper, and fully accessible if a refrigerant issue ever needs to be diagnosed. The trade-off is aesthetics. You will see a white rectangular channel running along your wall or roofline.
Concealed linesets are routed inside the wall cavity, through the attic, or beneath the floor before drywall is installed. When done correctly, you see nothing except the indoor unit on the wall. The trade-off is permanence. Once drywall is up, those lines are sealed in, and any future access requires opening the wall.
In a renovation or new construction scenario, concealed routing is almost always the right call if the walls are still open. In a retrofit where walls are already finished, concealed routing becomes far more expensive and invasive, so surface-mounted line hides are often the practical choice.
The important rule: once you choose concealed, you must finalize every indoor head location before drywall goes in. Moving a head two feet to the left after the fact means reopening the wall to reroute the lineset.
Decision 3: Finalizing every indoor head location before a single hole is made
This sounds obvious. It is routinely skipped.
Homeowners frequently say "let's put the head somewhere around there" and wave at a wall. The installer marks a spot, drills the penetration, pulls the lineset through, and closes the wall. Three weeks later, when the furniture arrives and the homeowner realizes the head is going to blow directly onto their dining table, or that the placement conflicts with a ceiling fan they forgot to mention, there is nothing easy to be done about it.
Before installation, stand in each room with your installer. Consider:
- Throw distance. The indoor head needs to circulate air across the room, not just blow at the nearest wall. Rooms wider than about 15 feet may need the head positioned to throw diagonally.
- Ceiling fan conflicts. A ceiling fan in the direct path of an indoor head creates turbulence and wildly inconsistent temperature readings from the unit's internal sensor.
- Furniture and traffic flow. The condensate drain line exits through the same wall penetration as the refrigerant lines. That exit point needs to drain freely outside and not drip onto a porch seating area or walkway.
- Aesthetic lines. In open-plan homes in Downtown Sarasota or Main Street at Lakewood Ranch, the indoor heads are visible from multiple angles. Their height and lateral position matters to the look of the room.
- Wall structure. Interior walls in Florida block construction homes have limited void space. In some cases the planned location simply cannot accommodate the lineset without a costly workaround.
If you are adding a head to a room addition or a sunroom, the structural and electrical considerations compound. That topic is covered in detail in our post on adding a mini-split to a sunroom or addition without overloading your panel.
Decision 4: The routing path through attic or interstitial spaces
In most Sarasota-area homes, refrigerant linesets travel through the attic for at least part of their run. Florida attics in summer routinely exceed 140 degrees Fahrenheit. That heat affects refrigerant lines in two important ways.
First, uninsulated linesets lose efficiency rapidly in an overheated attic. The refrigerant arriving at the indoor head is warmer than it should be, and the system has to work harder to achieve the set temperature. Every foot of attic run should be insulated, and the insulation should be wrapped tightly with no gaps.
Second, the attic routing path itself needs to be planned in coordination with existing attic obstacles: HVAC ductwork from any remaining central system, structural trusses, blown insulation, and any existing wiring chases. In a multi-zone install with four or more linesets, all of them originating from the same outdoor unit location and fanning out to different corners of the house, the attic can become congested quickly.
Your installer should document or photograph the routing path before insulation covers it. If something needs to be serviced years later, knowing exactly where each lineset runs saves significant time and expense.
Decision 5: The condensate drain path for each zone
Every indoor head produces condensate, water extracted from the humid air it conditions. In Sarasota's climate, that is a meaningful volume of water, particularly in summer. Each head needs a drain path that exits the structure cleanly, drains by gravity or with a condensate pump, and terminates somewhere that will not cause a nuisance or water intrusion problem.
In a multi-zone system, you have multiple drain lines to plan. They cannot all be afterthoughts routed down the exterior wall to wherever happens to be convenient. Before walls close, decide:
- Does each zone drain by gravity? If so, the indoor unit must be mounted with enough slope toward the drain outlet, and the outlet must be higher than wherever the water terminates.
- Does any zone require a condensate pump? This adds a small device and a power source. It needs to be accounted for in the electrical plan.
- Where does each drain line exit the exterior? It should not drain onto a neighbor's property, onto a walkway, or against the foundation.
In homes on Casey Key or the waterfront in Osprey where the ground slopes toward the water, gravity drainage is usually straightforward. In a two-story home in Lakewood Ranch or Bradenton where a second-floor head needs to drain, the routing becomes more involved.
Decision 6: How many zones you are actually running
Multi-zone condensers are sold to serve a specific number of zones, typically two through eight. But adding a zone later is not like adding a circuit to an electrical panel. You cannot simply tap into the existing outdoor unit if it was not sized for an additional zone. You either need a new, larger condenser (which means replacing the outdoor unit entirely) or a second standalone system.
If there is any chance you will want to add a zone in the future, say a currently unused guest bedroom in a home in Nokomis, or a future Florida room addition, the time to oversize the outdoor unit is before installation. A condenser rated for four zones that currently runs three heads costs only marginally more than a three-zone unit, and it preserves your flexibility without any future wall work.
This is the same logic that applies to comparing mini-split brands: buy for the system you expect to need over ten years, not just the one you need today.
What happens when these decisions are skipped
The pattern is consistent. A homeowner rushes installation to beat the summer heat. The installer works with incomplete information about furniture placement, future zones, or attic obstacles. The job gets done quickly. Walls close.
Within a few months, problems surface. A lineset in the attic was not fully insulated and that zone runs constantly without hitting its setpoint. A condensate drain was routed too flat and backs up, triggering the float switch and shutting the head off. An indoor head was placed without accounting for a ceiling fan and now the room never feels even. A homeowner wants to add a zone for a new home office and discovers the outdoor unit is maxed out.
Every one of those outcomes requires either opening walls, replacing equipment, or living with a system that underperforms. None of them are cheap fixes.
The FAQ page covers many of the questions homeowners ask after installation, but most of the answers to multi-zone routing problems are "it depends on what was done during installation," which is exactly why the planning phase matters so much.
Working with an installer who plans before they drill
The sign of a qualified multi-zone installer is not how fast they can pull a lineset. It is how much time they spend on planning before they touch a drill. A good pre-installation walkthrough should cover every decision above, and you should leave it with a documented layout: condenser location, each indoor head location with specific measurements, the routing path for each lineset, and the condensate drain plan for each zone.
If an installer is unwilling to spend that time before the job starts, that is meaningful information.
Our team serves homeowners throughout Sarasota, Bradenton, Venice, and across our full service area. Every multi-zone installation we do starts with a planning walkthrough precisely because the decisions made on that visit are the ones that determine whether the system performs well for the next fifteen years.
If you are in the planning stage for a multi-zone system and want to talk through the routing before anything is finalized, reach out and we can walk through it with you. The conversation costs nothing. Reopening drywall does.