How to choose the best location for your mini-split indoor unit
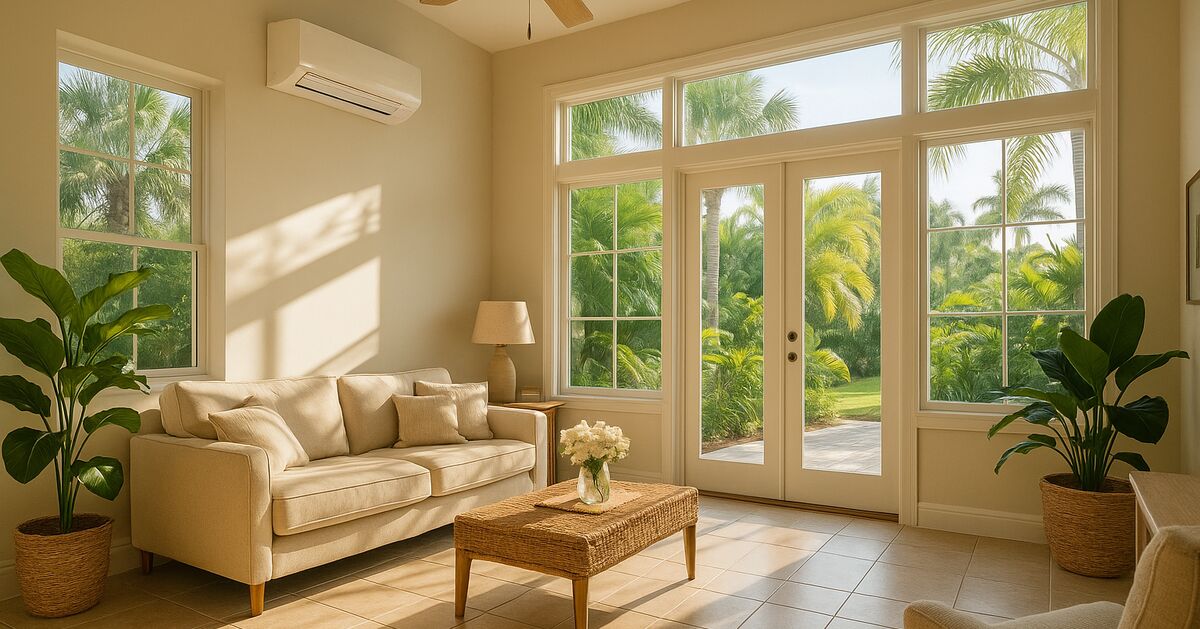
Poor placement ruins a perfectly good mini-split before it ever runs its first cycle. You can buy the most efficient unit on the market, pair it with a flawless installation, and still end up with hot corners, clammy air, and a compressor that never shuts off - all because the indoor head ended up in the wrong spot on the wall.
In Florida's climate, where the sun hammers your roof from April through October and humidity rides in off the Gulf every afternoon, placement matters more than almost anywhere else in the country. This guide walks through exactly how to think about indoor unit location, room by room, so you get the comfort and efficiency you paid for.
Why placement is not just a preference
A mini-split's indoor air handler (the "head" unit) moves conditioned air in a specific pattern. Most wall-mounted heads throw air horizontally across a room in a wide, sweeping arc. If something blocks that arc - a cabinet, a beam, a ceiling fan, an interior doorway - the air never reaches the far end of the room. The thermostat sensor inside the head reads the air right in front of it and tells the compressor, "we're done here," even though the back corner is still 82 degrees.
That sensor-location problem is one of the most common causes of comfort complaints we hear from homeowners across Sarasota, Bradenton, and the surrounding communities. The fix usually requires repositioning the head or adding a unit - both of which cost far more than getting it right at installation.
There are three overlapping reasons placement goes wrong:
- The installer chose convenience over airflow. It is easier to run the refrigerant line through a particular exterior wall, so the head goes where the line goes, not where the air needs to go.
- The homeowner requested a specific wall for aesthetic reasons. This is understandable. Unfortunately, the pretty wall is sometimes the worst wall.
- No one accounted for heat sources. Direct sunlight, kitchen appliances, and west-facing glass all create localized heat loads that an improperly placed unit cannot balance.
Understanding these failure modes makes the right decision much clearer.
The fundamental rule: cool from the interior, not the exterior wall
In most Florida rooms, your hottest wall is the one facing west or southwest, because afternoon sun hits it hardest. Your exterior walls in general are also where most of your heat infiltration happens. If you mount your indoor head on an exterior wall, the unit is sitting right next to the problem it is trying to solve. The sensor registers the warmth radiating through the wall, the airflow has to travel the full length of the room to reach the far side, and the whole system works harder than it needs to.
The better rule: mount the indoor head on an interior wall, high up near the ceiling, so it can throw conditioned air across the room toward the hot exterior wall. The air travels the length of the room, absorbs heat as it goes, and returns to the unit cooler and dryer. That is exactly how the refrigeration cycle wants to work.
There are real exceptions to this rule - especially in narrow rooms like Sarasota bungalows where interior walls are scarce - but in a typical open-plan home in Lakewood Ranch or a beachside cottage on Anna Maria Island, interior-wall mounting is almost always the better call.
Height on the wall matters almost as much as which wall
Most manufacturers specify a mounting height range of 6 to 8 feet from the floor to the bottom of the unit. In Florida, err toward the higher end of that range. Here is why.
Hot air rises. In a room with 9-foot ceilings - common in newer construction in areas like Lakewood Ranch or the newer developments outside Venice - the hottest air is pooling at the top of the room. Mounting the head at 7.5 or 8 feet puts the unit right in that hot layer. It pulls the warmest air across the evaporator coil first, cools it, and sends it back out in a long, descending arc that sweeps through the occupied zone of the room. That cascade effect is what makes a well-placed mini-split feel so much more comfortable than a central system blowing from a ceiling vent.
Mount it too low and the unit is fighting against its own airflow physics. The cold air it produces will drop immediately to the floor, the sensor reads the cold return air, and the system short-cycles. Short-cycling wears out the compressor faster and does a poor job of dehumidifying - which, as anyone who has spent a July afternoon in Osprey or Nokomis knows, is half the battle.
Clearances: the numbers most homeowners never hear
Every indoor head needs clear space around it to breathe. Ignore these and you can expect reduced airflow, ice buildup on the coil, and maintenance headaches.
- Above the unit: at least 6 inches of clear space between the top of the head and the ceiling (some manufacturers require more - check your specific model).
- Side clearances: 4 to 6 inches on each side, free of curtain rods, cabinet edges, and decorative molding.
- In front of the unit: the discharge area directly below and in front of the head should be clear for at least 3 feet, with nothing that deflects the airflow back into the unit's intake.
These clearances are not suggestions. They are conditions for correct operation. A unit mounted a few inches below a soffit in a Bayshore Gardens living room, or tucked into a corner where the drapes block the return, will underperform no matter how well the refrigerant charge is set.
Room-by-room placement thinking
Living rooms and great rooms
Open-plan living areas are the most common challenge in modern Florida homes. The ideal approach is to identify the room's longest axis and mount the head so it throws air along that axis. In an L-shaped room, a single unit almost never covers the entire space well. Be honest about this early, because sizing a single large unit to "cover" an L-shaped room usually means the sensor is satisfied while one leg of the L is uncomfortable. A second smaller unit - or a properly designed multi-zone system - is often the right answer.
For rooms with ceiling fans, coordinate the fan direction with the mini-split's airflow. In summer, ceiling fans should run counterclockwise (when viewed from below) to push air down. This works with the mini-split's descending arc rather than against it.
Bedrooms
Bedrooms get two additional considerations: noise and draft.
Nobody wants to wake up because the compressor kicked on, and nobody wants a stream of cold air blowing directly on them while they sleep. The solution is to position the head on a wall that is not directly above or adjacent to the bed, then aim the airflow toward the foot of the bed or along the wall opposite the sleeping area. Most mini-splits have auto-swing louvers that let you direct airflow away from any specific spot once you see how the air moves.
For noise, the indoor head itself is quiet - typically around 19 to 26 decibels on low speed. But the refrigerant line connection and the drain line both need to exit through the wall, and any vibration transmitted through a poorly mounted bracket will be amplified at night. A properly secured mounting plate, with rubber isolation pads, eliminates most of that.
Kitchens and open dining areas
Kitchens present a real placement puzzle. Cooking generates heat, steam, and grease-laden air. A mini-split head mounted too close to the cooking zone will accumulate grease on its filters fast, reducing airflow and requiring more frequent cleaning. Ideally, the head should be on the dining-room side of an open kitchen-dining layout, positioned so it can cool the dining area and allow the airflow to carry back toward the kitchen - rather than pulling kitchen air directly across the coil.
If the kitchen is fully enclosed, a small dedicated unit positioned away from the range is a reasonable option, but a kitchen exhaust fan doing its job properly will pull hot air out before the mini-split has to deal with it.
Florida rooms, sunrooms, and covered lanais
These are some of the trickiest spaces on the Gulf Coast. A Florida room with jalousie windows or single-pane glass has an enormous solar heat gain, especially if it faces west toward the water (very common in properties along Casey Key and the coastal neighborhoods of Osprey and Nokomis).
For enclosed Florida rooms, the indoor head should face the wall with the least glass exposure, and the unit should be sized generously - these rooms routinely have heat gains 30 to 50 percent higher than a comparably sized interior room. Also factor in whether the space has insulated walls and ceiling. Many older Florida rooms are essentially screen enclosures that were later enclosed with minimal insulation, which changes the heat load dramatically.
Open lanais and unconditioned screen enclosures are generally not candidates for mini-split conditioning - the air just escapes through the screens. However, we do occasionally see homeowners in Downtown Venice and on Anna Maria Island who have fully enclosed their lanais with impact glass and want those spaces conditioned. In that case, treat the space like a small room and size accordingly.
The refrigerant line set and why it affects placement
The line set - the copper tubing that carries refrigerant between the indoor head and the outdoor compressor - has to travel from wherever the head is mounted to wherever the outdoor unit sits. Line sets have length limits and should be kept as short and straight as possible to minimize efficiency losses and refrigerant charge adjustments.
This creates a practical constraint: the ideal head location may not be the most practical one if the outdoor unit is on the opposite side of the house. A good installer will work through this trade-off with you explicitly, rather than simply defaulting to the easiest routing. If you are curious about how installation decisions ripple into cost and complexity, our post on mini-split installation costs in Florida covers how line-set length factors into pricing.
Outdoor unit placement and how it connects to indoor comfort
The outdoor condenser unit needs its own careful placement - but it directly affects indoor unit performance. A condenser sitting in direct afternoon sun, in an area with poor airflow around it, runs hotter and has to work harder to reject the heat it pulls out of your home. This reduces efficiency and can contribute to the "why isn't it cooling enough?" complaints we diagnose all summer long.
The best outdoor placement is on the north or east side of the house, shaded if possible, with at least 12 to 18 inches of clearance on all sides. In the salt-air environments near the water - think Sarasota's barrier islands, Casey Key, or the Intracoastal neighborhoods around Bayshore Gardens - the outdoor unit should also be mounted off the ground on a stand or wall bracket to reduce exposure to ground moisture and salt splash.
What to ask your installer before they mark the wall
Before anyone drills a hole, have a direct conversation with your installer about these specific things:
- Where will the airflow arc land in this room, and does anything block it?
- Is there a heat source (window, appliance, exterior wall) that the sensor might read incorrectly?
- What is the planned line-set routing, and is there a better head location that shortens or simplifies it?
- What are the clearances on all sides, and does the mounting location meet them?
- Is this room's shape or size better served by two smaller units than one larger one?
A thorough installer will walk through all of this with you before installation day. If the conversation consists only of "we'll put it there," it is worth pushing for more detail. Our FAQ page covers several of these pre-installation questions in plain language if you want to go into that conversation well-prepared.
Getting the placement right from day one
The communities we serve across Sarasota County and Manatee County - from Main Street at Lakewood Ranch to the older neighborhoods of Downtown Sarasota to the quiet streets of Nokomis and Osprey - all have different housing styles, room configurations, and solar exposures. There is no single universal answer, but there is a consistent process: understand the room's heat sources, plan the airflow path, respect the clearances, keep the line set reasonable, and put the sensor somewhere it reads the room honestly.
Get those things right and a mini-split will deliver exactly the quiet, efficient, zone-controlled comfort it is designed for. Get them wrong and you will spend years chasing a comfort problem that the right placement would have prevented.
If you want a set of eyes on your space before making a placement decision, reach out to us and we can walk through the room with you. We serve homeowners throughout Sarasota, Bradenton, Lakewood Ranch, Venice, Osprey, Nokomis, Anna Maria Island, Casey Key, and the surrounding areas - and getting the location right before we drill anything is always part of how we work.